

There’s this notion (maybe even a myth) that you need a full-blown renovation to make your bathroom look better. Honestly (and I get how strange this might sound coming from a renovator whose work often involves complete overhauls), some of the most impactful transformations come from simple and practical upgrades. And today, we’re talking about one of my favourites: bathroom wall panelling. In my years as a renovator, I’ve seen how incorporating creative wall panelling ideas can enhance a bathroom’s personality while offering practical benefits. They save time and money, are easy to maintain and come in various designs to suit every preference or bathroom style.
In this guide, I’ll share insights on various bathroom wall panelling ideas, helping you make informed decisions for your renovation projects.
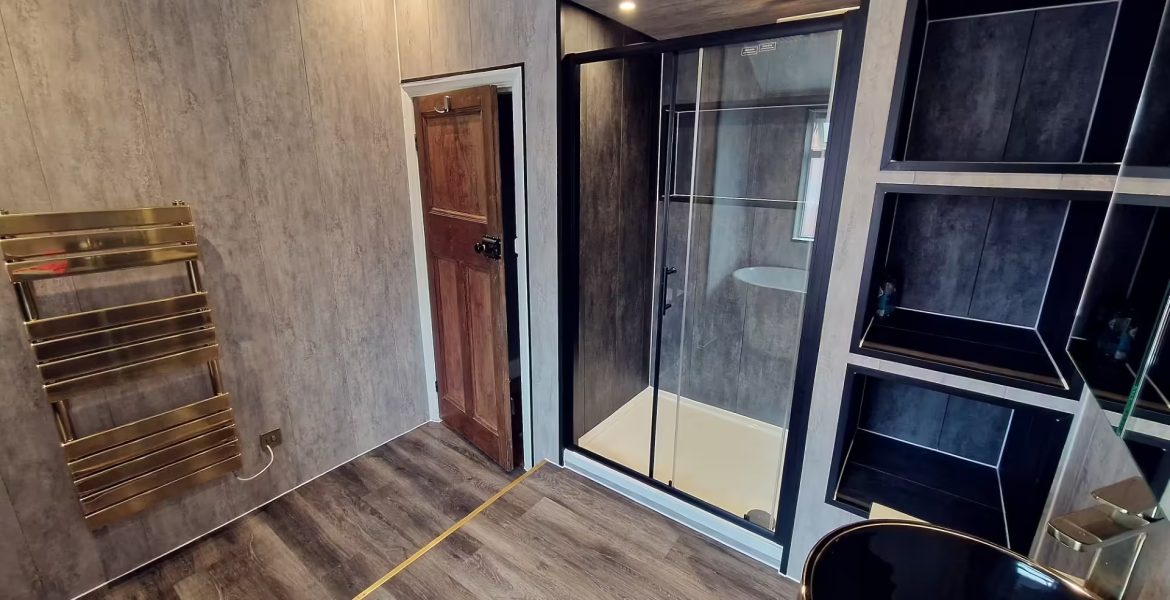
Types of Bathroom Wall Panelling: Ideas for Style and Durability
Bathroom wall panels are a versatile and durable alternative to traditional tiles. They come in various materials, each with unique properties suitable for different design preferences and functional needs. Below are some popular bathroom wall panelling ideas with their unique benefits in terms of style, durability and cost.
PVC Wall Panels
PVC bathroom wall panels are lightweight, waterproof and budget-friendly, making them a popular option for both homeowners and renovators. They’re perfect for DIY wall panelling projects because they’re easy to cut and fit. And they come in a wide range of designs, including marble finishes, tile and wood effects, and even 3D textured finishes. Basically, they can mimic expensive materials without costing a fortune. However, some versions can be fragile. For better strength, choose panels reinforced with calcium carbonate. These handle moisture well and work great as wet wall panels in showers.
Acrylic Wall Panels
Acrylic bathroom wall panels resist mould, making them ideal for shower wall panels. They come in high-gloss finishes and vibrant colours, which are perfect for a minimalist or contemporary bathroom design. Acrylic’s smooth surface is also simple to clean and maintain. On the downside, they can be pricier and might require professional installation.
MDF and Plywood-core Wall Panels
MDF panelling and plywood-core panels balance durability and affordability. They’re tougher than basic PVC panels yet require proper sealing. In other words, if water seeps into the core, swelling and damage can occur. So you need to always use a reliable adhesive and sealant to protect the edges.
Laminate Wall Panels
Laminate wall panels mimic the appearance of wood, stone or tile and are generally more affordable options. They’re durable and easy to clean, but when installing them, make sure they’re sealed properly to prevent water ingress.
Wood Wall Panels
Wooden wall panels bring warmth and a spa-like vibe to any bathroom. For longevity, opt for treated or marine-grade wood to withstand bathroom humidity and make sure to regularly maintain it. Wood effect bathroom wall panels offer the same rustic look with less risk of warping. Additionally, when panelling a bathroom with real wood, regular sealing prevents moisture damage.
3D Effect Wall Panels
3D effect wall panels add depth and texture and can serve as a focal point in your bathroom. Options can vary, with materials like PVC or MDF, so consider moisture-resistant types when making your selection. If noise is a concern (like loud plumbing), acoustic wall panels can help reduce echo. However, ensure they’re rated for wet wall use.
Wall Panel Design Considerations
When selecting wall panels, consider the following:
- A full wall coverage can help make the space appear larger.
- Half wall panelling combines panels with paint or wallpaper, adding character to your bathroom and allowing for colour contrasts and playfulness in DIY projects.
- Accent walls mean using panels on a single wall to create a striking focal point.
- Panel’s texture and finish: Matte finishes offer a subtle elegance, while gloss finishes can make the space feel brighter. Furthermore, textured panels add depth but may require more maintenance to keep clean. And for better sound control, acoustic wall panels can help reduce noise, just like I mentioned earlier.
There are no strict rules when it comes to choosing a design, as long as the installation is done right. There’s always room to get creative and try out unique bathroom wall panelling ideas that reflect your home’s vibe, which will make the process feel less exhausting and stressful.
How to Install Wall Panelling
Now let’s get into what I said is the most important part: how to install wall panelling in a bathroom for longevity and better appearance.
When installing bathroom wall panels, the priority is preparing a moisture-resistant surface. Clean and dry the walls thoroughly. And if you’re wondering, yes, panels can often be installed over existing tiles, saving you plenty of time and effort. However, if you prefer or need to remove them, check out our guide on how to remove tiles from walls without causing damage. Next, measure the shower area for width, height and fixture placement. This ensures your shower wall panels fit accurately. If you plan to reuse existing plumbing, confirm that the panelling you choose is compatible.
Mark the panel where fixtures protrude. Then, drill openings so pipes extend well beyond the panel surface. Conduct a test fit before applying adhesive. When ready, use a high-quality adhesive or silicone on each panel’s edges and back. Gently press the panel in place, pull it back slightly, then allow the adhesive to become tacky. After reapplying it firmly, seal all seams with silicone. Properly sealed joints and edges can prevent water ingress, which can lead to mould or panel damage. You can check out our comprehensive blog with tips and tricks on how to apply bathroom sealant for a professional finish.
Lastly, let the adhesive cure per the instructions. Clean finished surfaces by mixing water with vinegar or lemon juice and wiping them down gently to maintain a fresh look. Avoid common mistakes like improper measurements or using unsuitable adhesives, as these can compromise the installation.
What to Keep in Mind
Each wall panel material and bathroom environment requires different adhesives, so follow the manufacturer’s guidelines on how to install bathroom wall panels correctly.
Consider using a wall panelling kit that includes all the essential tools and trim pieces for the job. For example, a typical kit for a corner installation might include an aluminium internal corner joining trim, end trims, adhesive cartridges and sealant cartridges. Some brands also offer optional horizontal bottom trims, like PVC Sureseal, for added waterproofing. Also, many manufacturers provide cleaning accessories to safely remove excess silicone without damaging the panel surface.
Pros and Cons of Bathroom Wall Panelling
In my experience, bathroom wall panels offer notable benefits but also come with certain drawbacks. Below are some key pros and cons.
Pros
- Many wall panels for bathrooms mimic stone or tile, yet resist mold due to their non-porous finish.
- They’re easier to clean than tiled surfaces, especially shower wall panels with no grout lines.
- Installation is simple for most products, with each panel covering the area of 20-30 tiles and easily sticking to the wall.
- Panels are cost-effective, with shower panel installation ranging from £320 to £1,600, compared to £640 to £4,000 for tiling.
- You can install some waterproof bathroom wall panels directly over tiles, saving time.
Cons
- Durability varies, so cheaper bathroom wall panels may need replacement in about ten years.
- Large panels can be unwieldy and tough to maneuver through tight bathroom spaces.
- Some high-end materials require professional fitting, raising costs and limiting diy wall panelling options.
- They don’t flex for curved walls, so panelling in bathroom corners can be challenging.
- Synthetic finishes may look similar to real tile or stone, but never fully replicate their appearance.
Which one is better: Bathroom Wall Panels or Tiles?
When deciding between wall panels and tiles, it ultimately depends on your priorities. From my experience, panels are superior to tiles in many ways. They’re easier and faster to install, often fitting directly over existing tiles, which saves time and effort. Maintenance is another big advantage because panels are completely waterproof, making them easier to clean and less prone to mold. In contrast, tiles rely on grout lines, which can crack or degrade over time, leading to water damage if not maintained. Additionally, panels come in a variety of materials like PVC, acrylic and the other types I mentioned earlier, offering a wide range of styles and finishes to suit different preferences. While tiles provide a classic and aesthetic look, panels are a practical and budget-friendly alternative for most bathrooms.
Maintenance and Care of Bathroom Wall Panels
Use non-abrasive cleaners and soft cloths to prevent scratching. Regular cleaning prevents mould and mildew buildup (if you’re dealing with mould issues, check out our blog on how to get rid of mould in bathrooms for detailed removal and prevention tips). Furthermore, make it a habit to check for any signs of damage or water ingress, particularly at joints and edges, so issues can be addressed promptly. For minor repairs, such as sealing small gaps or replacing damaged sections, follow the manufacturer’s guidelines to maintain the panels’ integrity. Wipe them with non-abrasive cleaners to prevent scratches. Lastly, inspect the joints and corners regularly, and if you notice any gaps, I’d recommend sealing them promptly with silicone.
How to Paint a Panel Wall
First, lightly sand off the gloss. Next, wipe the surface with a suitable cleaner, then rinse. Apply a shellac primer for improved paint adhesion. However, moisture can still cause flaking if the primer fails to bond. I’ve witnessed paint peeling on wet wall panels despite strict prep work. Therefore, sand every inch, and remove all residue before priming. For a durable finish, consider waterproof wall panels for bathrooms instead. In my experience, these panels resist moisture far better than painted surfaces. Transition to painting only when you’re certain of solid adhesion. This approach saves time, money and future repairs.
Environmental Considerations
If you’re concerned about your carbon footprint, consider eco-friendly bathroom wall panelling ideas. These options use materials like recycled PVC or sustainably sourced wood. Additionally, choosing panels made from recyclable materials can help reduce environmental impact over time. For better indoor air quality, look for low-VOC (volatile organic compound) panels, which emit fewer harmful chemicals. By making these environmentally conscious choices, you can create a sustainable bathroom that aligns with your values while maintaining functionality and style.
Need Expert Help with Bathroom Wall Panelling Ideas?
If you’re considering a bathroom upgrade but aren’t sure about handling the installation (and you’re in England), clicking on this guide might’ve just helped you find the renovation company you’ve been looking for. At AV Modern Bathrooms, we focus on full professional bathroom renovations that align with your needs and vision. And yes, we can help you with wall panelling ideas that suit your preferences.
The first home visit is free (no strings attached), for a chance to chat with our team and see what works for your space. Installations are quick to minimise disruption, and we always clean up after ourselves. Renovations start at £3,600, and as a little extra, we include a free LED mirror with every full bathroom renovation. Plus, we offer a 1-year workmanship warranty, and our maintenance team is available to assist with any issues that might come up after the renovation.
And if that’s not enough to make you choose us, we also provide all the materials you’ll need! You can visit our showroom at 69-71 Higher Parr St, St. Helens WA9 1AD, where you can discuss with our experts, find the best solutions for your renovation and check out our wide range of products. If you’d like to learn more about how we can work together, book your free quote today! We’d love to hear from you and help you get started on your dream bathroom!
FAQs
How to fit bathroom wall panels?
Ans: Fitting bathroom wall panels involves careful measurement and proper installation. Start by measuring carefully and working out the spacing from the center of each panel. This helps make sure everything lines up nicely with the walls, ceiling, and floor. Cut the panels to size, then apply adhesive and press them firmly into place. Once they’re all up, seal every joint with waterproof caulk to keep moisture out. If needed, add a coat of paint or a few finishing touches to give it a polished look.
How to fit acoustic wall panels?
Ans: To fit acoustic wall panels, start by cleaning and levelling the wall. Measure carefully, marking from the center of each panel for consistent spacing. Cut panels to size, especially around outlets and apply adhesive or screws as recommended. Press each panel firmly in place, ensuring a snug fit. If you’re working in a moisture-prone area, seal the edges to prevent water damage. Once installed, test the acoustics and adjust placement if needed for optimal sound performance.
How to install shower wall panels?
Ans: Here’s how I’d recommend installing shower wall panels to get the best results. First, make sure the wall is clean and waterproofed. This step is important for avoiding future issues. Next, apply a good-quality adhesive to the back of each panel. Carefully position the panel on the wall, then press it firmly to make sure it’s securely in place. Once all the panels are up, seal the edges and joints with waterproof silicone to keep moisture out. And take your time with the alignment and sealing.